From Bassinet To Girl's Desk

During a recent bedroom make-over, my 6 year old daughter requested that I put a desk in her room. It had to be small to fit in the intended space in the room, so this need initiated a very long search. After a deal to purchase a desk/chair set, from Craigslist fell through, I decided to make one myself. I had no idea how to make it happen being that my woodwork skills are subpar.

Miraculously, one morning as I entered the garage, I noticed the Eddie Bauer bassinet my children used as babies, and the idea struck me, "Why not use the bassinet to make a desk". 


 I forgot to take a before picture (I was too eager..lol) This is a replica of the bassinet.
source

I took it apart, and removed the hardware.


After doing this, I noticed that both of the arched tops were flat towards the center. As a result, I determined the arched sections would be the legs. (If you look closely to the left, you will see the flat section, right next to the 3 holes) 

I had them modified to fit the space, and further gave them nice coats of white paint. 

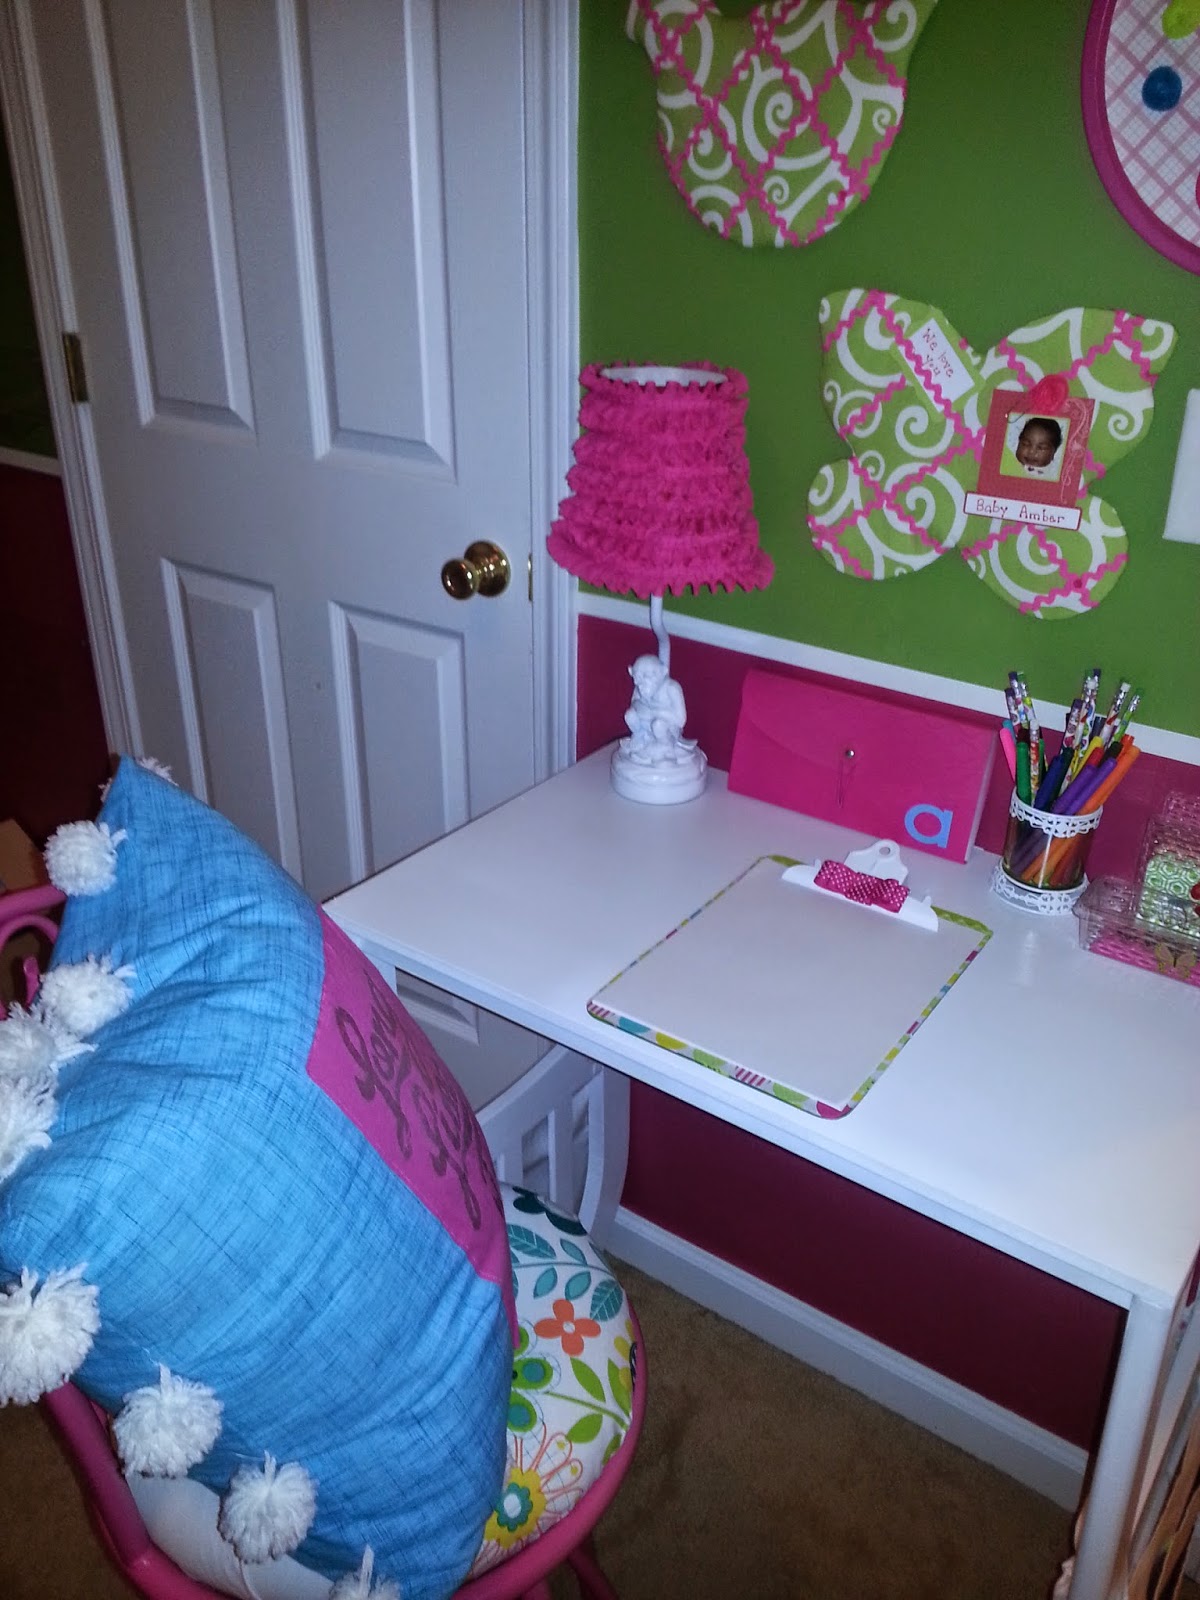
Now here it is in my daughter's room.


I attached it to the wall, to ensure added security.


I also made two desk bags, mimicking the contours of its legs. These provide storage for her books clipboard, calculators etc. (A tutorial on the bags will be created soon)  :-)

I hope you were inspired :-). Thanks for stopping by, and have a great weekend!


Pottery Barn Ribbon Board Knock-off

 Enjoy, and share this beautiful Mother's Day with a special lady in your life; someone who have inspired you in some way, to become a better individual.

Today, I want to share with you one of my latest projects, done for my 6 year old daughter. During a recent bedroom makeover, she requested that I put butterflies in her room. I thought of adding pin/clip boards, and after searching online, stumbled upon these. They are Shaped Ribbon Boards from Pottery Barn, considered a bit pricey for me.

I opted to work on a DIY ribbon board.

Items Used
Foam Board
Scissors
Spray Adhesive
Glue gun/sticks
Fabric
Ric rac trim
Polyester fiberfill

I found a simple bird shape in my daughter's school supplies that I liked. First, I  made a template for cutting out the shape on the foam board. I then spread some polyester fiberfill all over the shape, and attached it using spray adhesive. 
Note: If you attempt to make this, the spray adhesive dries really fast, so it's best to lay the fiberfill on the shape first, then attach a little at a time.


Next, I used the template to cut out the fabric.
I left a 1 1/2 inch border to attach to the back of the shape. 


Finally, I carefully wrapped the fabric over the shape and hot-glued it to the back of the foam board, while tugging firmly. When I was through, I lined up the ric rac on the diagonal, and hot-glued it to the back, to form the desired pattern. You can cover the back with felt, or leave it as-is because it will not be visible.

Here's the finished product.


I also made a Butterfly shaped board
They are both hung on my daughter's bedroom wall.


She really loves them.

I hope you were inspired. Thanks so much for stopping by!

One Room Challenge: Week 6 - Amber-lee's Room Reveal!

It is reveal day everyone, and I am happy to report that I completed my 6 year old daughter, Amber-lee's bedroom. Yay! I think I succeeded in making her happy, as per her request: butterflies, flowers, lalaloopsy, and a "table desk" to write on.  


This room was painted a few years ago, but I never got around to decorating it. Here is where I started.


Now for the after:


The curtains were made using the sheet that came with the bedding set. I never use sheets on our beds, hence my decision to do this. I basically cut the sheet down the middle, and added the pink trim...simple huh? :-)
I also spray-painted some old curtain rings to match the rod.


This lalaloopsy pillow buddy is one of my daughter's favorite. 
She loves all things lalaloopsy. 


This pink vintage cushion was a gift made by my mom.

If you followed along for the entire challenge, you would have recalled me mentioning the bedding set did not include a skirt. I made this bed skirt using a sheet from another of my daughter's bedding sets. It was inspired by this Pottery Barn ruffle bed skirt. I must add, this was the most time-consuming project :-). 


I love this flower art purchased at Kirklands; mostly its 3-D effect. The butterflies/dragonflies are wall decals that glow in the dark.


 I have dreamed of buying these book holders for the longest. I just love them! Now she has a place in her room for her books. 


Right below, is this little house organizer from Target. I used letter stickers to add the words. I could not fit the word, "stories", so I opted for story.. 


Moving on to the desk, or should I say, Bassi-desk...lol.
The desk was originally an Eddie Bauer oak bassinet. It was placed upside down, and modified to fit the space. The bassinet was disassembled for the purpose of storing, and as a result, one of its parts became lost, making it unsafe for newborns. 
After removing the hardware, I discovered a flat top in the middle of the curved rail.
To see how it was made go here.


I made these desk bags from leftover curtain fabric, to conceal its rounded legs (I did not want it to appear visibly hacked).The bags have 3 compartments to hold items such as paper, clipboard, calculators etc. 


My daughter requested butterflies in her room, hence this Pottery Barn knock-off. I added the bird because there are bird prints on her comforter. For a full tutorial, go here.
The magnetic board was made using a pizza platter from Dollar Tree. I spray-painted it and used spray adhesive to attach scrap paper.


DIY button magnets

I made the magnetic cups to hold magnets/clips.

The melamine/acrylic containers are a napkin holder and butter dish (turned upside down), from Dollar Tree. I added textured stickers. The butter dish is the perfect size for that huge eraser, also found at the store.


The pencil/marker holder is a candle holder purchased at Family Dollar. I spray-painted the metal parts, white. Her clipboard received a mini makeover as well.


By the way, please "check out" this lovely floral fabric on her stool.


It is a dish towel from the Hobby Lobby's Spring Collection.The counter stool is one of a set of 3 from J C Penney. I spray painted, and reupholstered it, to match the room's color scheme.  


I made the pom pom cushion following this tutorial.


My daughter loves her monkey lamp. She really adores monkeys. I spray-painted it and re-purposed the shade with the same trim used on the drapes. That trim went a long way, 'I tell ya' :-) Miss monkey is being naughty, and refuses to sit gracefully, so I may need to make her a little skirt :-).


I painted stripes on these pin boards purchased at Target.


I placed her lalaloopsy book in a picture frame. I simply taped the back, cover page, to the glass.


This charging station was a lucky find at Target from the clearance section ($3.48). I added a foam alphabet board which I had contemplated throwing out. The letters from the board were all squished up, so my kids had stopped playing with it.


Spray painted and recovered shade using another Hobby Lobby dish cloth...added pom poms

This Target trash bin was another clearance item, ($3.68). Target is by far, my favorite store. I love that place.


I made this ceiling shade by reupholstering an old lamp shade with fabric purchased at Hobby Lobby. I used bias tape for the trim.

The room has a 12 ft ceiling which made it extremely difficult to capture this shot.


With remnant left over from the shade, I made this doll blanket.


Diana

The doll bed is a gift from my daughter's Godmother. It has a trundle underneath.

This pelmet box was made for a tiny alcove in the room. I apologize for the poor picture quality. The alcove is rather high, so I tried my best to get a good picture.


Moving along: Now on to the closet. 
 BEFORE

Here is the after


The clock is a hack, and is non-functional. I spray painted it, changed out the face, and added textured stickers to substitute as numbers. It is set to 6:45, the time my daughter gets dressed for school in the mornings. {inspiration source}.


The bookcase is from Target. I lined the back of it with wrapping paper, and added a riser to the bottom using a wine crate, cut in half, horizontally. This created additional space for her shoes. I left the riser a natural tone to tie in with the baskets.


Hot-glued ribbon and bows to the baskets
Her hair bow doll is a DIY. I used yarn, buttons, and a round plaque, to make it. 
Hair bow holder


Well, that wraps it up for the tour. I hope you were inspired by at least, one item in this space.

I am extremely happy I completed this room. I had so much fun, and truly wish I could hug Linda right now. Thanks, Linda! Count me on board again for the next challenge. 

I appreciate everyone who supported me throughout all of this. Thanks a lot, and have a wonderful weekend! I am now off to check out the incredible spaces decorated by the other linking participants who accepted this challenge.


Do It Yourself
Desk: DIY (upside down Eddie Bauer bassinett)
Desk bags: DIY
Bird/Butterfly boards: DIY 
Vintage pink round cushion: DIY "my mom"
Pom pom cushion: DIY
Pom pom lampshade: DIY
Bedskirt: DIY
Ceiling shade: recovered - DIY
Pillow cases: added trim - DIY
Clock: hacked - DIY
Ottomans: reupholstered - DIY
Curtains: DIY
Magnetic board: DIY 
Doll hanging hair bow holder: DIY
Letter A/Flower art: DIY

Linking up with Wow us Wednesday #169