Cheap Art for the Frugal at Heart

Is it just me, or does the cost of 

expensive art sometimes leave you

 stunned. While perusing a popular 

website, I came across this painting. It

 was priced at a whopping $1,699.95 

marked down from  $6,000. It is called 

"Cotton Picking".


I researched the artist's name and 

discovered she is from descendants of

 artists. What baffles me the most is that 

although these paintings are costly, they

 sometimes appear simple in 

appearance. By simple, I mean,

 something my 6 year old could whip up.

 I am by no means discrediting talented 

artists, I am just expressing my own 

interpretation of what I see. Does 

anyone else feel the same way at 

times? 


Well, enough of the expensive talk. Let's


 get down to the cheap talk. After all, 

"talk is cheap", isn't it? :-)  Take a look at

 all the cheap poster prints I scored at

 Michael's recently. I happened to see a 

huge bin on the outside with a sign

 marked $1.50. Really! I mean, ladies 

were digging in when I pulled up at the

 store.


This is a very popular John Audubon "heron" print. It is the same size as  this one 24" x 18", being sold for a whopping, are you ready? $49.99.


As you may notice, the print was marked down from $32.99, and although the ticketed price reads $3.00, it scanned at $1.50.

There were several of these photographic prints (eucalyptus plant)


This one has a variety of colors, hence the reason I like it :-)


These two I bought for my daughter's bedroom.
Well, thanks Michael's :-) Awesome deal!
Have you scored any great deals lately?


KId's Lounge Reveal! ORC

Well, the six weeks challenge has finally come to an end. I am a little late in posting...


 As a reminder here is my room before:


very sad

And now here is the after. I refrain from putting anything close to the rails for fear of my little one climbing on it. The loft overlooks a two-story foyer.


Footprints of both kids framed


Temporarily slip-covered sofa until re-upholstery fabric arrives


I only completed one of the roman shades on time, but I am satisfied with that :-)

I intend to reupholster the sofa. I originally ordered too little fabric, so I have to wait until the additional yardage I ordered, arrives. Am I echoing boo hoo's over that? Oh no. In fact, I am super happy that I got this far. It is ha ha's all the way:-)

I must add how much my family loves this space now. My hubby stops and stares at it, my toddler says, Wow! and my daughter will not stop smiling when she looks at the space. Now if I could get our pet parakeet to tell me what it thinks :-) "just kidding".

Well, thanks again Linda for hosting this incredible party:-) Also, thanks to the many participants who took the time to share their weekly progress. You all are incredible! And guess what? I plan to do it again. If you are a new reader, join Linda next year for another awesome party!


ORC Week Five...Moving Along

Thanks to everyone who poured out their love on my blog in regards to my daughter. During the past week, the temperature here in Georgia took a downward plunge. It suddenly became very cold, and this triggered her illness. Thankfully, she is doing a lot better. 

Well my friends, it is now 'crunch time', and I am smiling on the inside. Why? Because I am imagining all the participants (including myself) 'scurrying' around trying to finish in time for reveal day :-) This is so much fun. I feel like a kid again, excited and anxious to see all the goodies everyone will present. 

Here's what I accomplished this week.


I spray-painted the table. I needed the paint to set in really well before putting it back together. Here's the before:


I also did a layout of how I would like to have the kids' photos hung on the wall.


 I am contemplating spray-painting both letters (representative of their initials) different colors to make them pop. The space to the right of the 'P' will be filled by the thermostat :-) I might put something to the left of it or just leave it blank. The two artworks to the top left/right has their 
  • full names
  • birth date/year
  • weight/height at time of birth
  • time of birth (and)
  • location of birth


This was a DIY. I got the idea from one I saw online couple years ago. Unfortunately I was not yet on Pinterest so I do not have a source to link to. The two small frames hold photocopies of my kids' footprints received from the hospitals they were born. I will give a better closeup of these on reveal day after they are hung. 


  Be sure to check out the other One Room Challenge participants for this week, and do have a great weekend!

ORC Week Four

My, My! Where has the time gone? I just cannot believe how quickly the weeks are passing by. Well I am trying my best to complete my tasks.

 One Room Challenge Linking Participant


Sewed Cushions


 Here's a sneak peek of the rug

 Unfortunately, I did not get to paint the wall this week because my daughter had an asthma attack. The loft is right next to her room, and so I was afraid if I painted, it might have triggered another one. I had to postpone painting for next week :-( I still have quite a few things left to do but I am trying my best to complete it on time for reveal day.  Be sure to check out the other One Room Challenge participants for this week. Have a great weekend.

Simple and Pretty Fall Leaf/Pumpkin Pillows

I love the warmth that the season of Fall brings; the cool temperatures, and the colorful leaves on the trees. Red, yellow, orange, and brown are its traditional colors, and so today, I made my very first Fall pillows using red felt decorations purchased from Dollar Tree. I saw this one , and I loved it so much I decided to make my own.

I used both a pumpkin and a leaf decoration to make two pillows.


Felt decoration from Dollar Tree 

18″ pillow insert

18×18″ burlap fabric (front)

Off white Coordinating fabric (back)

White thread


ORC Link Party: Week 3 - Sewing Painting & more Sewing


Well, it is week three of the One Room Challenge and I am a little late in doing my posts. I recently celebrated my 10th Anniversary and was away for a week. I was asked nicely to stay away from my beloved computer, but I 'jumped' right back on task as soon as I returned home. 


My sewing machine has been working really hard to assist me in my quest to make my room pretty. Fortunately, during my recent getaway I was able to purchase my fabric which made me totally ecstatic.

Working on window covering


 This will be a kids' space so I am trying to make it a little cheery by incorporating some colors. 


Picture frames painted

I am thinking of painting this table next, and hopefully persuade my hubby to help me paint the stripes on the wall :-)
"HELP! I need a face-lift"
Well, that's it for now, and please remember to go and check out the other participants of the One Room Challenge. Have a great weekend.


LOFT CLIMBING HIGHER

I am so happy to be able to participate in Linda's One Room Challenge. I recently began blogging and am presently trying to get into the fun of things. I must say I was a little nervous at first, but Linda made it so easy for us to be comfortable that I felt confident enough to proceed.  "Everyone's a winner", according to her. Thanks for the motivation Linda! :-)


Well, of all the rooms in my house, this is the only space that was never painted. I was always unsure of what color to paint it, or how to accessorize it. It is in such a bad state but I hope to "put an end to that!" lol


This space overlooks a two story foyer so I only have an L-shaped wall to work with. My daughter calls it the kid's living room. It is actually an area designated just for them.


The Plan

1) Paint striped walls using Bedford Grey by Martha Stewart 
2) Add both my kids' photos on Left wall 
3) Add storage unit 
4) Paint accent table 
5) Add chair cushions
6) Add area rug..other accessories to be added


My inspiration 


Well, that's all 'for now' until....
All the best to everyone who will be participating. Just remember, in the end


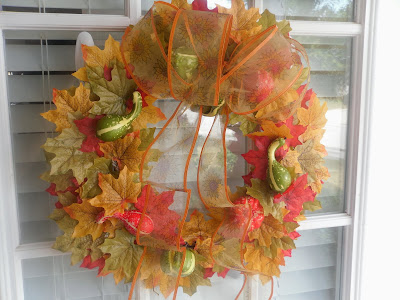
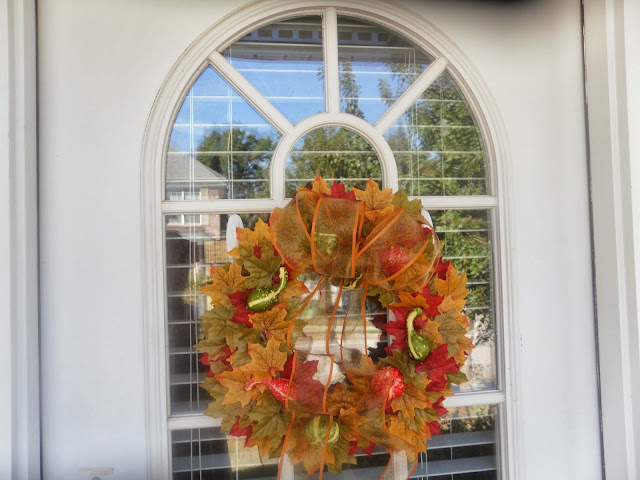
Dollar Tree Fall Wreath

Fall is officially here, and I am seemingly "falling" short of executing my projects. I thought I would start off by making a wreath for my front door. I have seen many wreaths on varied blogs that I liked, but wanted to go the frugal way. My inspiration came from this lovely one made by Allison from House of Hepworths. She used items purchased at Dollar Tree to make hers. I am happy I found it because I am always elated to discover a less expensive way of doing things. For this project I used:


1 18" wreath

2 bags assorted fall leaves
1 fall ribbon
3 packs mini pumpkins and gourds
glue sticks

 These items also came from Dollar Tree. Unfortunately, I forgot to take pictures of each of them before I started. Luckily for me, the wreath turned out beautifully. I love it. 


 It was very difficult to get a good photograph of it because outside was quite sunny.


Don't you just love Fall? The leaves change colors and create such a beautiful and enchanting atmosphere. I especially like the poems we recited at school as kids.


"September is a time

Of beginning for all
,
Beginning of school

Beginning of fall."

Sadly, here in the south, children return to school in August.


 "Red, yellow, orange, and brown
Leaves are falling to the ground"
...Well, I encourage you all, if you have not yet started, to go gather some of these falling (faux) leaves and make yourselves some wreaths. That is, if wreath is "your thing".  :-)


I just love mine, and best of all, it did not cost much. 
Happy Fall Y'all!